Application Builder Updates
For users of the Application Builder, COMSOL Multiphysics® version 5.3 brings an improved Graphics form object with the ability to pick coordinates and other data from the plotted results in a running app. Additionally, the Model Data Access function has been renamed Data Access and expanded to include Application Builder parts, while the Shortcuts functionality has been expanded to include more options. Read about all of the Application Builder updates in detail below.
Pick Coordinates and Data in Graphics Form Objects Using the Mouse
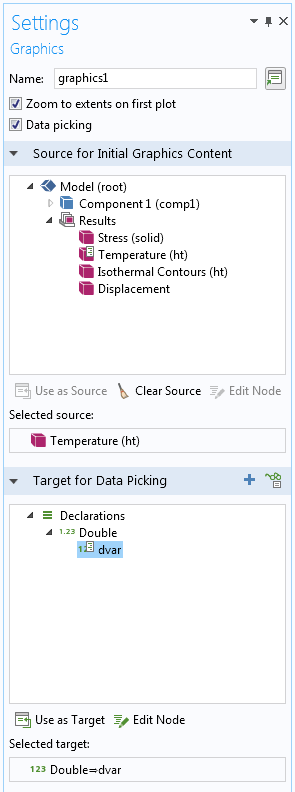
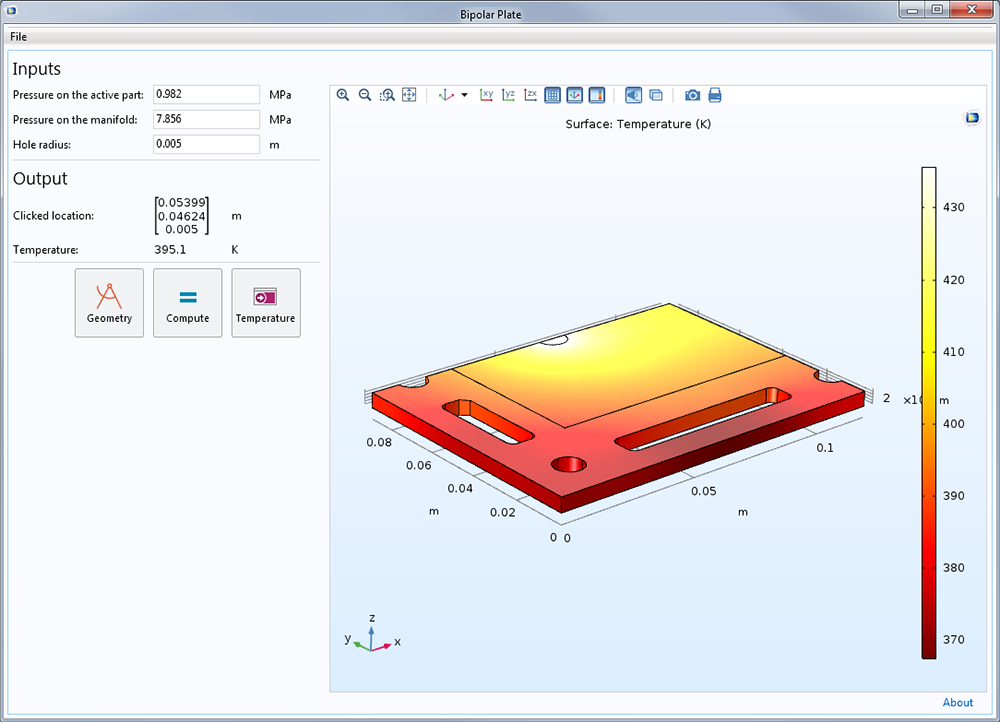
Applications can be made more interactive with data picking support for the Graphics form object. With data picking enabled, you can create apps where the user picks coordinates or clicks in plots to evaluate an expression at the given point. This functionality is enabled in the Graphics form object and can be both enabled and disabled on-the-fly in a running application.
The result of the pick operation can either be stored in a double array declaration (to retrieve coordinates), a double declaration (to retrieve evaluated results in a plot), in a point probe node (to let the user choose the position of probes), or in the new Graphics Data declaration. This last choice is a custom declaration for data picking in plots and geometries. With that declaration, you can retrieve both coordinates and evaluated data, as well as create form objects that help the app user pick points in domains in 3D.
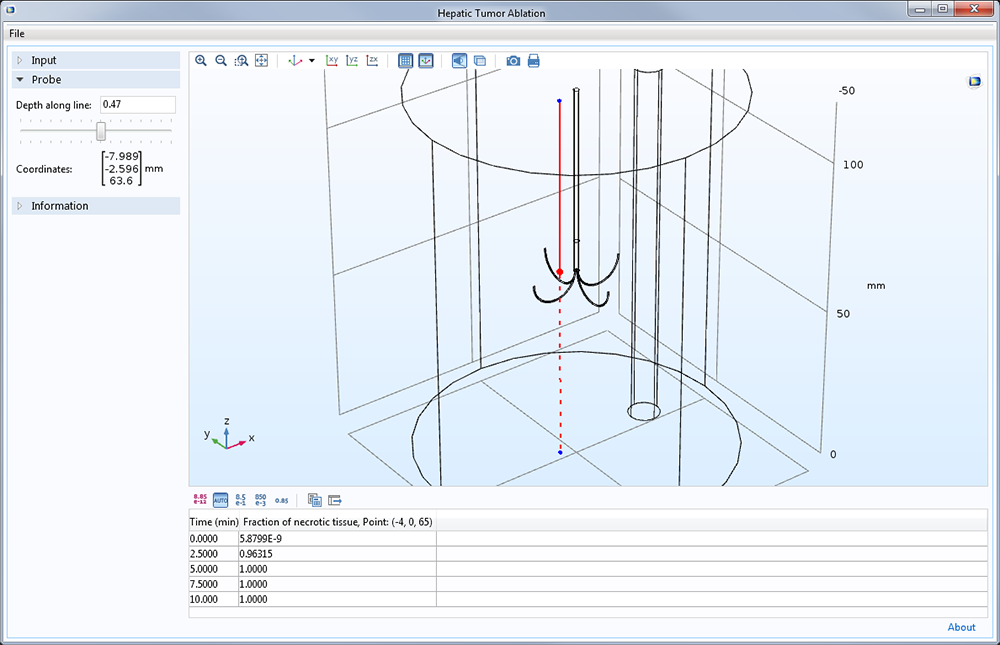
An app where the user can define the position of a probe in the Probe section. Data from this probe point will then be stored while computing the solution and displayed in the table toward the bottom. In the example, this is the fraction of necrotic tissue over time from an app simulating tumor ablation.
Model Data Access Available for Application Parts
The Model Data Access functionality, which has been renamed Data Access, is now available in the Application Builder settings in addition to the Model Builder settings and is used to make these settings available in form objects.
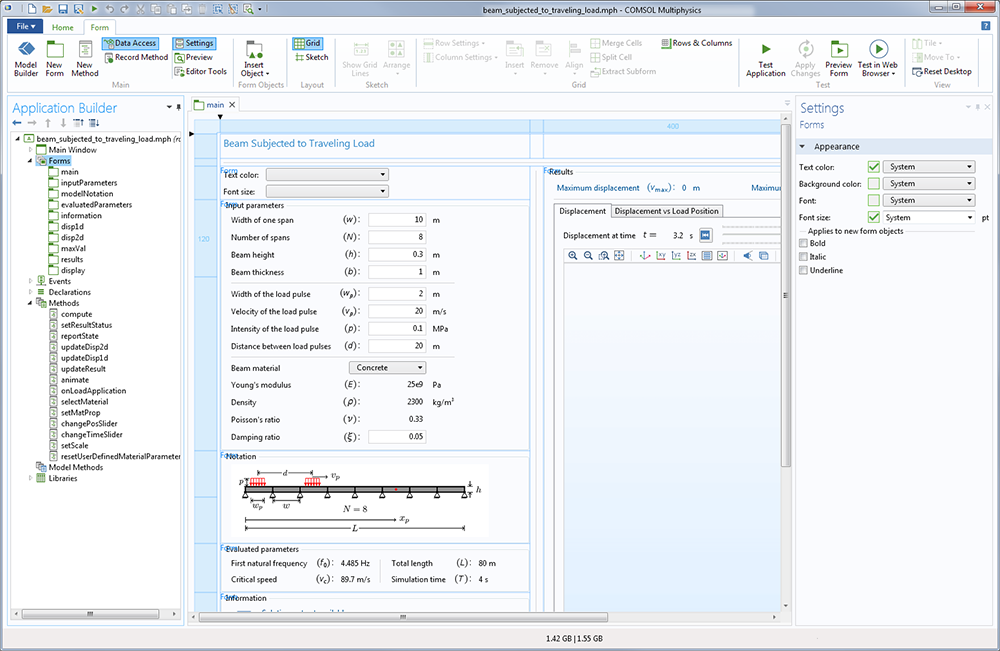
The Data Access functionality has been enabled for both font size and color in the Appearance Settings window.

This makes them appear in the form objects' source trees and means that they are available for use.
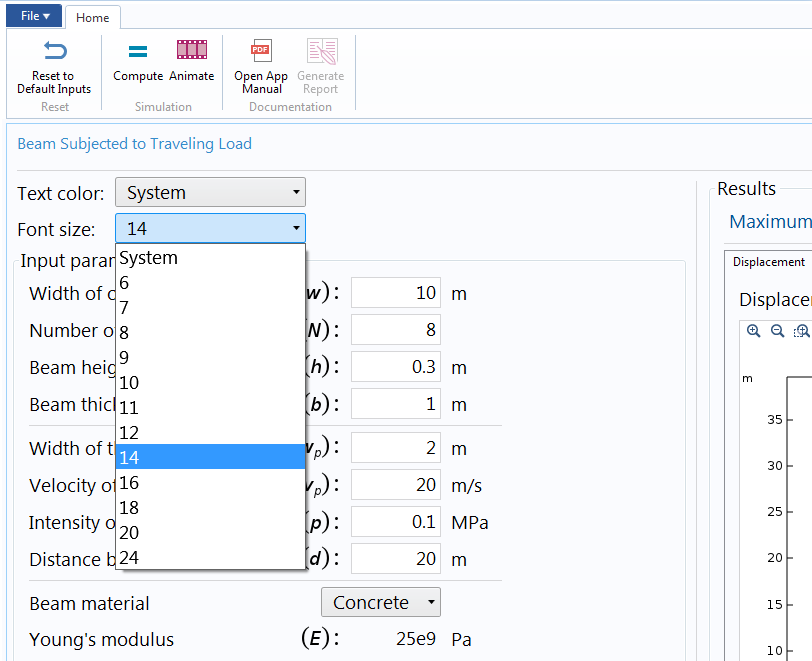
When users run the app, they can change the font size and color on-the-fly.
Use the Shortcuts Button to Create Shortcuts
Shortcuts are used to more easily reference objects and were previously available for application objects such as menu items and form objects. They have now been extended to include operations from the entire model. You can create a shortcut either directly from the model node's settings or from within the Method Editor. The chosen custom name then becomes available as a variable in methods. The Use Shortcut button can be found in the Code section of the ribbon, in the Method tab.
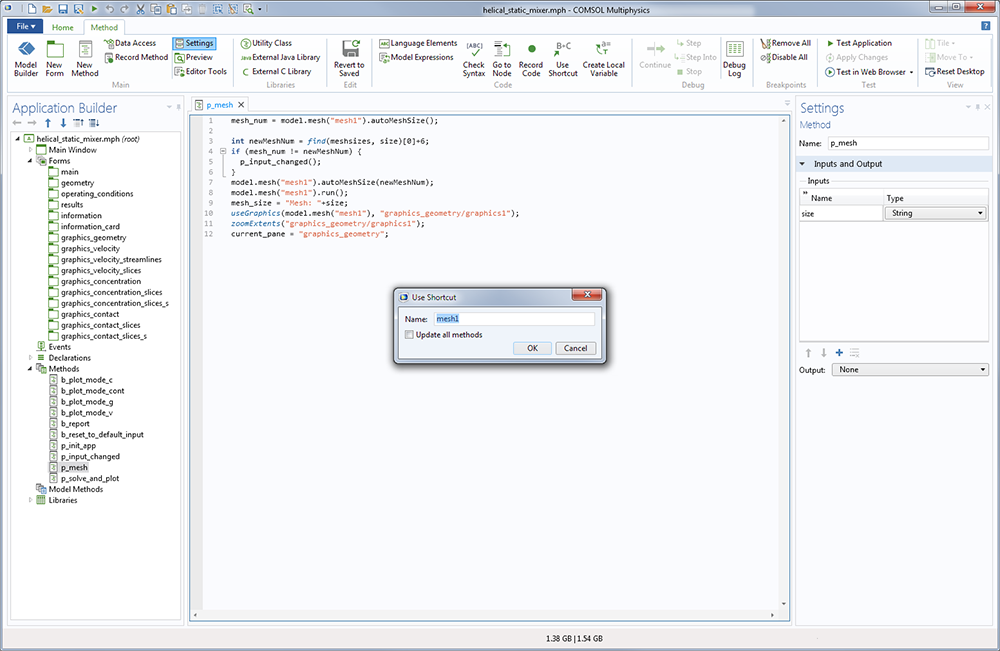
To create a shortcut to the method that controls the mesh operation, first place the cursor inside the "mesh1" custom name in the method code and then select the Use Shortcut button from the ribbon.
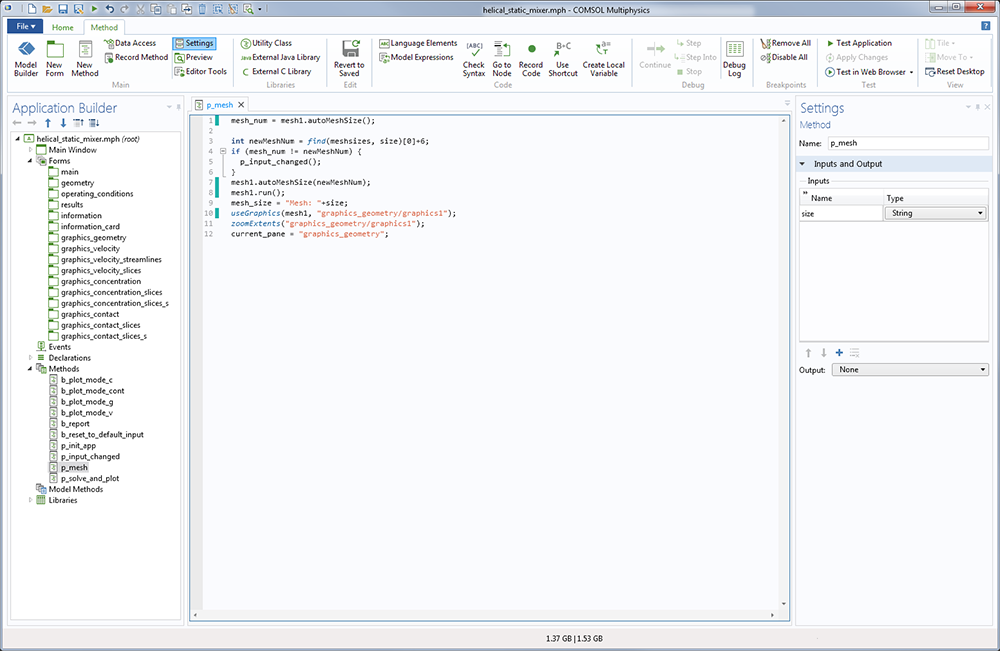
This creates a shortcut to the mesh node in question. When you click "OK" in the Use Shortcut window, the code is appropriately updated to use this new shortcut.

The shortcut could have been created and can be renamed directly within the Mesh node Settings window.
Updates to the Form Editor
There are several updates to the Form Editor:
- Form objects can now be cut and pasted in addition to copied and pasted
- Invisible or disabled form objects have a distinct visual style inside the Form Editor to better mimic the final app
- Table form objects display the initial values from the data source inside the Form Editor
- Select All and Clear Selection commands are available when working with selections and can be included in command sequences and in methods
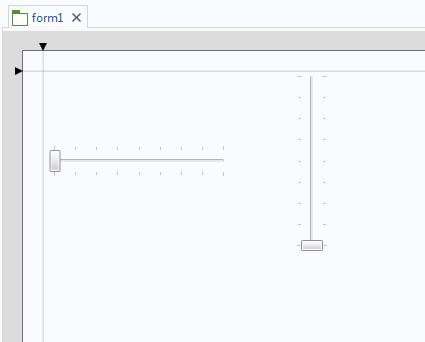
- The Slider form object has an orientation property that allows you to make vertical sliders
- Units can be displayed in a separate object when using Data Display form objects
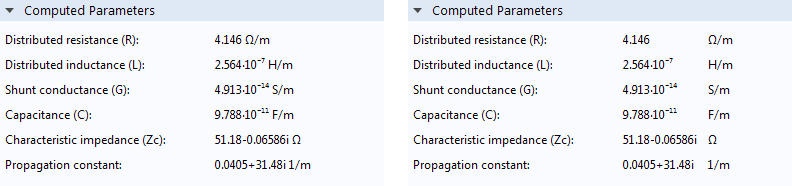
Units displayed inside Data Display form objects (left) and in Unit form objects, which are separated from the Data Display form objects (right).
Updates to the Method Editor
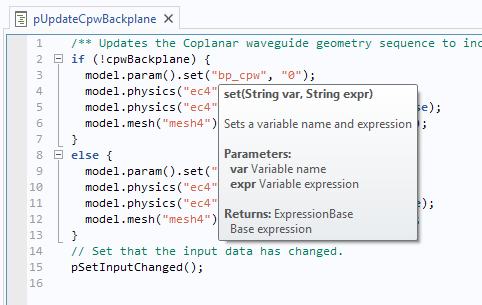
There are several improvements to assist you when writing code inside the Method Editor. Improved, informative tooltips now appear when you hover over properties, declarations, shortcuts, and built-in methods in the code. These tooltips summarize data types and other information for these specific commands.
Furthermore, you can automatically get assistance with declaring local variables or setting the type of a local variable. For example, you can type x = model.geom() and press the Create local variable button (or press Ctrl+1), which changes the code to GeomList x = model.geom(). This support is similar to the functionality that creates shortcuts, yet instead of a global shortcut, you create a local variable that is only available within the current method.
Several additional settings can be changed while the app is running:
- The Precision, Notation, and Exponent settings in the Data Display form object
- The Equation property in the Equation form object
- The Enabled, Visible, Text, and Icon settings for user-defined buttons in the Toolbar, Graphics, and Table form objects
A set of new built-in methods can be used to check if the necessary products are available as well as to check out licenses. This can be used to reserve licenses not currently needed by the app, but that you know will be needed later on. This method also allows you to provide custom error messages for missing licenses.
The new Ignore license errors during launch setting makes it possible to start running an application even if the required licenses are missing. The notification of missing licenses occurs first when the missing license is required for performing a specific operation, such as for a computation. This makes it possible to investigate an app's structure and settings, even if you do not have all of the licenses that were used to create the app. Furthermore, this allows you to run the part of the app that does not require the missing license without getting an error message.